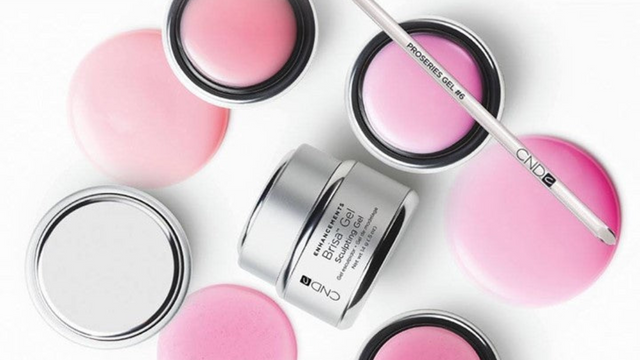
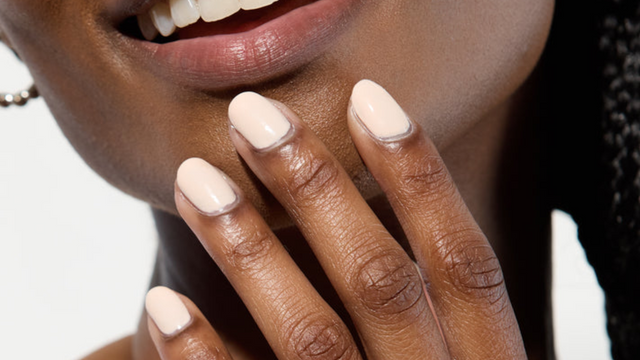
If you're a professional looking to perfect your nail enhancement game, check out this complete step-by-step guide on how to apply CND BRISA Gel Extreme Enhancements.
Step 1: P.R.E.P.
1. P - Perform a Manicure
a. Have the client wash their hands with soap and water and towel dry.
b. Massage COOLBLUE Waterless Hand Cleanser into the client's hands to cleanse skin and help prevent the transmission of germs.
c. Remove any existing nail color from the natural nail using an acetone-based polish remover (CND SHELLAC NOURISHING REMOVER or SCRUBFRESH Natural-Nail Surface Cleanser) with a plastic-backed lint-free pad.
d. Apply a small amount of CuticleAway Cuticle Remover evenly around the cuticle of each nail.
e. Gently slide a cuticle pusher along the nail plate toward the cuticle area and along the lateral folds to lift and loosen any non-living tissue from the nail plate. Remove any excess CuticleAway from the nail and use a curette to remove non-living tissue up to the eponychium and lateral folds.
f. Scrub nails thoroughly with soap and a damp brush, then rinse with warm water to remove the cuticle remover and soap; towel dry.
g. Use a manicure nipper to carefully remove any loosened, non-living tissue, as well as any loose pieces of skin or hangnails. Use a gentle touch during cuticle remover to protect the seals.
h. Divide the nail into four equal vertical parts with a pencil. Start by drawing a line down the center of the nail dividing the nail in half, then divide into four quarters.
i. If necessary, trim the length from each nail, using nail clippers.
j. Shape the extension edge of each nail with the 240-grit side of a Kanga File and remove the outside corners of the extension edge filing up, and into the sidewalls at a 90-degree angle, keeping the file underneath the file extension edge. Use the pencil lines to help with symmetry.
2. R - Remove shine from the natural nail surface with the 240-grit side of the Koala Buffer in the direction of nail growth.
3. E - Eliminate surface contaminants and
4. P - Purify nail plate layers
a. Thoroughly cleanse and temporarily dehydrate the nail plate layers with SCRUBFRESH using a lint-free, plastic-backed pad. Gently pull lateral folds back and scrub thoroughly to be sure all areas of the nail are completely clean.
Step 2: Apply Clear PERFORMANCE FORMS with CND Dowels
*available by attending CND Extreme Enhancement Class
1. To prepare the form, apply a pre-shaped metal tab to the sticky back of the SILVER PERFORMANCE FORMS.
2. Cut out a square "U" shape using the form's perforations and inside grid as your guide.
3. Peel the cut metal away from the Silver PERFORMANCE FORMS and apply to the back of a Clear PERFORMANCE FORM. This will create added support to the clear form.
4. Select a dowel.
a. Draw back in the vertical lines, diving the nail into four quarters. Select a dowel that fits between the top half of the nail. The correct dowel size should line up to the edges of the two outer lines.
5. Cut the back tab of the PERFORMANCE FORMS and pre-tailor the edge of the form that fits under the extension edge, to deepen the curve if necessary.
6. Wrap the PERFORMANCE FORMS around the large end of the dowel to create the C-curve on the form.
7. Apply the form.
a. Open the back tabs to allow the form to slide over the finger. Place the form at a 45-degree angle under the natural nail and gently squeeze the lateral folds of the skin while easing the form up into place.
b. Check for proper fit. The form should be straight and parallel with the finger. The back tap should not connect and have approximately 1/8 of an inch gap between the tabs.
8. To shape the form once it is in place, use the pre-selected dowel and place under the form. Gently squeeze the form around the dowel from the smile line to the end of the form to create an even and symmetrical C-curve.
9. To slim the C-curve at the extension edge, select a dowel one size smaller than the original dowel. Place under the form and squeeze only at the natural nail extension edge, concentrating the squeeze on the pads of the finger. This will create two small darts in the form.
10. Cut the tabs on the bottom of the PERFORMANCE FORMS to ensure proper hand placement for optimum cure.
Step 3: Apply BRISA Bond
1. Apply one thin layer of BRISA Bond to the natural nail plate of 2-3 nails at a time, ensuring that the brush has enough liquid to thoroughly and evenly cover each nail. Repeat this step until all nails are thoroughly and evenly coated.
Remember: When applying BRISA Bond, do not touch the skin or allow the product to flood the cuticle area.
2. Apply to five nails and cure each hand for 10 seconds (preset button 1) in the CND LED LAMP.
Step 4: Create a Base Layer (optional)
*This step will ensure proper adhesion and help prevent service breakdown. Implement when needed.
1. Apply a thin to medium layer of BRISA Clear or Pure Pink - Sheer Sculpting Gel to the natural nail.
2. Apply to five nails and cure each hand for one minute (preset button 2B) in the CND LED Lamp. DO NOT REMOVE THE TOP FILM AFTER REMOVING NAILS FROM THE LAMP.
Step 5: Zone 2
1. Before sculpting the nail, determine where to place the smile line in order to create an extreme illusion. Bear this placement in mind, as you begin sculpting.
a. Place a small amount of BRISA Opaque Pink Sculpting Gel in Zone 2 near the natural nail's extension edge. Sculpt the gel to the desired length to define the placement of the smile line. Taper the gel in the back of Zone 2 so it blends into the natural nail.
The product should be thicker in apex and taper to the sidewalls and Zone 3.
2. Apply to five nails and cure each hand for one minute (preset button 2B) in the CND LED Lamp. Do not remove the top film after removing the nails from the lamp.
Step 6: Zone 1:
1. Pick up a scoop of BRISA Pure White Sculpting Gel and place in the middle of Zone 1. Gently guied the gel up into each corner to create a crisp smile line. Smooth to create a thin extension edge.
2. Clean the sidewalls. Begin in the middle of the sidewall and brush up toward the smile line, then brush from the middle of the sidewall down toward the extension edge. Then clean the extension edge to create the length.
3. Apply to five nails and cure each hand for one minute (preset button 2B) in the CND LED Lamp. DO NOT REMOVE THE TOP FILM AFTER REMOVING THE NAILS FROM THE LAMP.
Step 7: Build The Apex - Zone 1
1. Add a smaller scoop of BRISA Pure White Sculpting Gel in the center of Zone 1, towards the smile line. Build a "smile wall" by guiding the gel along the existing smile line, while keeping the bulk of the product in the vertical apex. Be careful not to press the product past the existing smile line, into Zone 2. Check to ensure the height of the smile wall is not higher than the desired apex.
2. Add additional white sculpting gel to fill in the rest of Zone 1.
3. Leave a thin layer of gel on the brush and dip the brush into COOLBLUE. Gently press the gel from the sidewall up to the apex on both sides to build the vertical apex. Use the tip of the brush and light presses to crisp the smile line. Lightly feather to smooth the bottom third of the extension edge.
4. Apply to five nails and cure each hand for one minute (preset button 2B) in the CND LED Lamp. DO NOT REMOVE THE TOP FILM AFTER REMOVING THE NAILS FROM THE LAMP.
Step 8: Zone 2 & 3
1. Place a small scoop of clear sculpting gel in Zone 2 and smooth the gel up to the smile line filling in any low spots. Then ease the gel back to the cuticle area to cover Zone 3. Use the tip of the brush and a very light touch to guide the product from sidewall toward the vertical apex on both sides of the nail.
2. Apply to five nails and cure each hand for one minute (preset button 2B) in the CND LED Lamp. DO NOT REMOVE THE TOP FILM AFTER REMOVING THE NAILS FROM THE LAMP.
Step 9: Shape and Define
1. Remove the top film with 99% Isopropyl Alcohol and a plastic-backed pad.
2. Remove Clear PERFORMANCE FORMS from the nail.
3. Lightly dull shine using a Boomerang Padded File and then divide the nail into four even sections using a pencil and the same technique for P.R.E.P.
4. Shorten and shape the extension edge using a Blizzard File.
5. Refine the sidewalls using a one-directional stroke, filing in an upward direction with a Kanga File. Start at the sidewall where Zone 1 meets Zone 2. Refine the cuticle line to blend into the natural nail.
6. Thin and refine the very edge of the extension edge using the one-directional stroke in a downward motion.
7. Establish the apex using the Blizzard File and the one-directional stroke, filing from apex towards the extension edge.
Using a side-to-side multi-directional stroke, file from the apex towards the cuticle line creating a flattened surface.
8. Smooth and refine the lower arch by placing the Kanga File under the sidewall, filing up, keeping the file parallel to the finger.
9. Turn the finger to the side and file flat on the sidewall straight up from the lower arch on both sides of the nail. When you look down the barrel of the nail the surface should look flat like the top of a stop sign or pencil.
10. Smooth and refine the enhancement by filing up from the sidewalls towards the apex while simultaneously moving the file up and down the nail from the extension edge to the cuticle on both sides, being careful not to file on the areas previously filed.
11. Repeat steps with the Boomerang Padded File to further smooth and refine. Refine extension edge as needed.
12. Remove any dust with a disinfected brush and a plastic-backed pad saturated with 99% Isopropyl Alcohol.
Step 10: Apply BRISA Gloss
1. Apply a thin layer of BRISA Gloss to the extension edge and nail surface of all fine nails on one hand.
a. Pull the coated brush from the bottle and wipe both sides on the neck of the bottle to remove excess top coat and flatten the brush hairs on both sides.
b. With the flattened brush, draw a thin line of top coat along the extension edge of the nail to seal and ensure complete coverage.
c. Dip the brush into the bottle to completely coat with top coat. Pull the brush out of the bottle and scoop a small bead on one side of the brush large enough to create your top coat layer. Flatten and drain the other side of the brush on the opposite side of the bottle's neck.
d. Place the bead in the center of the nail and glide it down to the extension edge.
e. Gently ease the brush up towards the cuticle area, being sure to leave a tiny free margin for a clean, even line, then glide the brush down towards the extension edge to complete the center coverage of the nail.
f. Rotate the finger to the right, and pull back the lateral fold so the left side of the nail is clearly visible.
g. Using the left corner of the brush, apply the top coat over the left side of the nail, following the contour of the sidewall as closely as possible from cuticle line to extension edge.
h. Rotate the fingers to the left, and pull back the lateral fold so the right side of the nail is clearly visible.
i. Using the right corner of the brush, apply the top coat over the right side of the nail, following the contour of the sidewall as closely as possible from cuticle line to extension edge.
j. Apply to five nails and cure each hand for one minute (preset button 3) in the CND LED Lamp.
3. Remove the top film with 99% Isopropyl Alcohol and a plastic-backed pad.
4. Massage SOLAROIL Nail and Cuticle Conditioner into the nails and skin.
Products Required:
- COOLBLUE Hand Cleanser
- OFFLY FAST Moisturizing Remover
- CuticleAway Professional Cuticle Remover
- SCRUBFRESH Nail Surface Cleanser
- CND Files and Buffers
- CND Clear PERFORMANCE FORMS
- CND Silver PERFORMANCE FORMS
- CND ProSeries Gel Oval Brush #6
- BRISA Bond
- BRISA Sculpting Gels
- BRISA Gloss
- SOLAROIL Nail & Cuticle Care
Accessories/Equipment Required:
- CND LED Lamp
- Hand Towels
- Hand Soap
- Plastic-Backed, Lint-Free Pads
- Disinfectible Dust Brush (optional)
- 99% Isopropyl Alcohol
- Cuticle Pusher
- Manicure Nippers
- Nail Clippers
- Curette
- Curved Cuticle Scissors
To view the entire step-by-step guide, CLICK HERE.
Want early access to upcoming collections and exclusive discounts? Download our mobile app! Enjoy an easy & seamless shopping experience right from the palm of your hand. Join our text club to stay up to date on the latest news from us! You'll be the first to know about any upcoming sales or promotions. Want to become a VIP member? Join our FREE Rewards Program and start earning points for your purchases! Points may be redeemed for special discounts or free products! Like shopping with us? Tell your friends! We'll give them $10 off their first purchase and give YOU $10 for every successful referral. Shopping has never been easier thanks to Afterpay! Shop now and pay for your order in 4 easy, interest-free installments. The best part is that there are no additional delays in getting your order.


